
Flashing error codes are a dishwasher’s way of telling you something’s wrong, and LG’s AE code is one of the most common culprits. The good news? It’s often a straightforward fix that doesn’t require a service call. The AE error points to a leak or overflow detection issue, which can stem from anything as simple as a kinked hose to a faulty drain pump. This guide walks through exactly what the AE code means, why it happens, and how to troubleshoot it step-by-step without guesswork or wasted time.
Table of Contents
ToggleKey Takeaways
- The LG dishwasher error code AE signals a leakage error triggered by the float switch in the base pan, which detects water accumulation from actual leaks, poor drainage, or other moisture sources.
- Common causes of the AE error code include kinked drain hoses, clogged drain pumps, leaking door gaskets, excess suds from non-HE detergent, faulty water inlet valves, and damaged float switches.
- Start troubleshooting by inspecting and cleaning the drain hose for kinks or clogs, checking the water supply inlet screen for mineral buildup, and thoroughly cleaning the filter and sump area.
- Use only high-efficiency (HE) dishwasher detergent, scrape plates before loading, clean the filter monthly, and inspect hoses annually to prevent the AE error code from recurring.
- Call a professional repair technician if the error persists after troubleshooting, if the water inlet valve or drain pump needs replacement, or if there are cracks in the tub or sump assembly.
What Does the AE Error Code Mean on Your LG Dishwasher?
The AE error code stands for “Leakage Error.” LG dishwashers are equipped with a leak sensor (also called a float switch) located at the bottom of the unit, inside the base pan. When water accumulates in that pan, whether from an actual leak or improper drainage, the float lifts and triggers the sensor, cutting power to the cycle and displaying the AE code.
This safety feature prevents water damage to your floors and cabinets. The machine won’t resume normal operation until the water is cleared from the base pan and the underlying issue is resolved. In some cases, the error may appear even if no visible leak is present: residual moisture or detergent buildup can trigger the sensor.
Understanding this distinction is important: the AE code doesn’t always mean your dishwasher is actively leaking. It may indicate poor drainage, a clogged filter, or even excess suds from using the wrong detergent. Knowing what trips the sensor helps narrow down your troubleshooting.
Common Causes of the AE Error Code
Several issues can trigger the AE code, and identifying the root cause saves time and prevents unnecessary repairs. Here’s what typically goes wrong:
Kinked or Clogged Drain Hose
If the drain hose is bent, crushed, or partially blocked, water can’t exit the machine properly. This causes backflow into the base pan, activating the leak sensor.
Faulty or Dirty Drain Pump
The drain pump moves wastewater out of the dishwasher. If it’s clogged with food debris, broken glass, or grease buildup, water pools at the bottom and eventually overflows into the base pan.
Leaking Door Gasket
The rubber seal around the door can crack, warp, or accumulate grime over time. A compromised gasket allows water to escape during cycles, dripping into the base pan.
Excess Suds from Non-HE Detergent
Using regular dish soap or non-HE (high-efficiency) detergent creates excessive foam. The suds overflow the tub and seep into the base, where the sensor interprets it as a leak. Many dishwasher error codes stem from detergent misuse.
Defective Water Inlet Valve
If the inlet valve doesn’t shut off properly, it can overfill the dishwasher, causing water to spill into the base pan.
Damaged Base Pan or Float Switch
Physical damage to the base pan or a malfunctioning float switch can cause false positives, triggering the AE code even when no water is present.
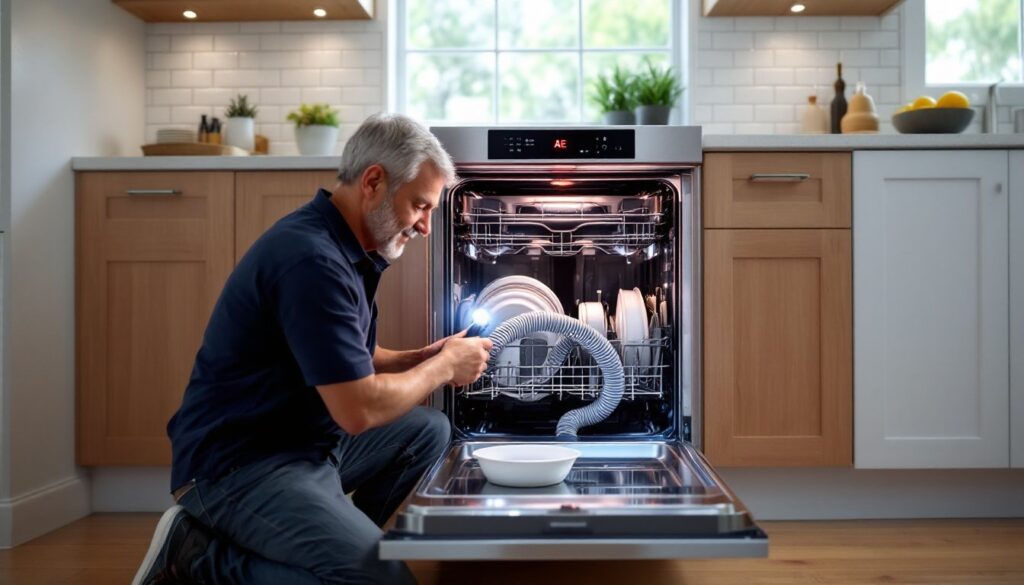
Step-by-Step Troubleshooting Guide
Before starting, disconnect power to the dishwasher at the breaker or unplug it. You’ll be working around water and electrical components, so safety comes first. Grab a flashlight, towels, and a shallow pan to catch any residual water.
Inspect and Clean the Drain Hose
The drain hose is the flexible tube that carries wastewater from the dishwasher to your home’s drain line or garbage disposal. A kink, clog, or improper installation here is one of the most common AE triggers.
- Pull the dishwasher forward (if accessible) or open the lower access panel. You may need a screwdriver to remove screws or clips.
- Locate the drain hose at the back of the unit. It’s typically a ribbed, corrugated plastic or rubber hose about 1 to 1.5 inches in diameter.
- Check for kinks or sharp bends. The hose should have a gradual upward slope to prevent backflow, but excessive bending can restrict flow.
- Disconnect the hose from the dishwasher outlet and the drain connection (usually a clamp or compression fitting). Have a towel ready, water may spill.
- Flush the hose with hot water over a sink or bucket. Use a straightened wire hanger or plumber’s snake to dislodge debris if water doesn’t flow freely.
- Reinstall the hose securely. Ensure the high loop (the section that rises near the countertop) is at least 20 inches above the floor to meet IRC plumbing standards and prevent siphoning.
If the hose is cracked or brittle, replace it with a universal dishwasher drain hose available at any hardware store. They’re typically sold in 6- or 10-foot lengths.
Check the Dishwasher’s Water Supply
While the AE code usually points to drainage or leaks, an improperly functioning water supply can contribute to overfilling and subsequent overflow.
- Turn off the water supply valve under the sink (if accessible).
- Disconnect the water inlet line from the dishwasher. This is typically a braided stainless steel or copper line attached to a solenoid valve at the front lower corner of the unit.
- Inspect the inlet screen inside the valve for sediment, rust, or mineral buildup. Use a small brush or toothpick to clean it. Hard water areas often see calcium deposits here.
- Test the water inlet valve by turning the supply back on briefly (with the line disconnected and aimed into a bucket). Water should flow freely and shut off cleanly when you turn the valve off. If it drips continuously, the valve may need replacement.
- Reconnect the line and check for leaks. Tighten fittings by hand, then give a quarter-turn with a wrench, overtightening can crack plastic components.
Additional Troubleshooting Steps:
Drain the Base Pan
Tip the dishwasher back slightly (with help, these units weigh 60–80 pounds) and let water drain from the base pan into towels. Wipe the pan dry and inspect for cracks or debris.
Clean the Filter and Sump Area
Remove the lower rack and twist out the cylindrical filter at the bottom of the tub. Rinse under hot water, scrubbing away grease and food particles. Check the sump (the cavity below the filter) for broken glass, bones, or other obstructions.
Run a Test Cycle
Reconnect power and run a short rinse cycle. Watch for water pooling, listen for unusual pump noises, and check underneath for drips. If the AE code reappears immediately, the issue is likely electrical or sensor-related.
For a comprehensive breakdown of LG dishwasher error codes and their meanings, professional repair guides offer additional diagnostic charts.
When to Call a Professional Repair Technician
Some AE code scenarios require tools, parts, or expertise beyond typical DIY scope. Here’s when to bring in a pro:
Persistent Error After Troubleshooting
If you’ve cleared the drain hose, cleaned the filter, dried the base pan, and the AE code still appears, the issue may be a faulty float switch or control board malfunction. These require multimeter testing and part replacement.
Water Inlet Valve Replacement
While accessible, replacing the inlet valve involves shutting off water, working with compression fittings, and ensuring proper electrical connections to the solenoid. Incorrect installation can cause flooding.
Drain Pump Failure
If the pump motor is burned out or the impeller is seized, you’ll need a replacement pump (part numbers vary by model, typically $50–$120) and disassembly of the lower assembly. This is a 1–2 hour job for someone comfortable with appliance repair.
Leaking Tub or Sump Assembly
Cracks in the plastic tub or sump housing usually aren’t cost-effective to repair. A technician can assess whether a part replacement or full unit replacement makes financial sense.
Warranty Considerations
LG dishwashers typically carry a 1-year parts and labor warranty, with extended coverage on certain components. DIY repairs can void warranties, so check your documentation before disassembling.
Expect to pay $100–$200 for a diagnostic visit and $150–$400 for parts and labor, depending on your region and the specific repair. Always get a written estimate before authorizing work.
Preventing Future AE Error Codes
A few simple maintenance habits keep the AE code from becoming a recurring headache.
Use Only HE Dishwasher Detergent
High-efficiency formulas are low-sudsing and designed for modern machines. Regular dish soap or hand-washing liquid will create a foam party in your dishwasher and trigger the leak sensor. Stick to pods, powder, or liquid labeled “HE” or “automatic dishwasher.”
Scrape Plates Before Loading
You don’t need to pre-rinse, but remove large food debris, bones, and stickers. These clog the filter and drain pump, leading to poor drainage and AE errors.
Clean the Filter Monthly
Twist out the filter assembly and rinse under hot water. For tough grease, soak it in warm water with a degreasing dish soap for 15 minutes. Kitchens with heavy use should clean filters more frequently to maintain appliance performance.
Inspect Hoses Annually
Once a year, pull the dishwasher forward and check the drain hose and water supply line for wear, kinks, or buildup. Replace any hose showing cracks or brittleness.
Run Hot Water First
Before starting a cycle, run the kitchen faucet until water is hot. This ensures the dishwasher fills with hot water from the start, improving detergent performance and reducing grease buildup in the drain system.
Check the Door Gasket
Wipe down the rubber seal every few weeks to remove food particles and prevent mold. If it feels stiff or shows cracks, replace it, gaskets are inexpensive and easy to swap.
These small steps add up to a longer appliance lifespan and fewer surprise error codes.