
Matte black kitchen cabinets have evolved from a niche trend into a mainstream design staple, anchoring everything from modern farmhouse kitchens to sleek contemporary spaces. The finish delivers drama without gloss, depth without shine, and pairs with nearly every material, marble, butcher block, stainless steel, brass. Unlike glossy black, which telegraphs fingerprints and water spots, matte absorbs light, hides minor wear, and creates a velvety backdrop that makes countertops and hardware pop. Whether planning a full remodel or a cabinet refresh, understanding the trade-offs, installation options, and upkeep realities will determine whether this bold choice becomes a design win or a maintenance headache.
Table of Contents
ToggleKey Takeaways
- Matte black kitchen cabinets are a timeless, versatile design choice that works across modern, farmhouse, industrial, and Scandinavian styles without appearing dated.
- The matte finish effectively hides fingerprints, water spots, and minor scratches better than glossy alternatives, making it practical for high-traffic kitchens.
- Matte black cabinets require regular cleaning with mild soap and water, but avoid ammonia-based or abrasive cleaners that can damage the finish and create shiny residue.
- Poor lighting is a key consideration—matte black absorbs light and can make small kitchens feel cave-like, so plan for under-cabinet LED strips and task lighting to compensate.
- DIY painting existing cabinets is achievable for experienced improvers using bonding primer and matte cabinet paint, while professional installation is recommended for complex layouts, custom work, or new construction.
- Pair matte black cabinets with contrasting countertops and hardware—such as white quartz, brass accents, or natural stone—to maximize visual impact and prevent the kitchen from feeling dark.
Why Matte Black Cabinets Are Dominating Kitchen Design
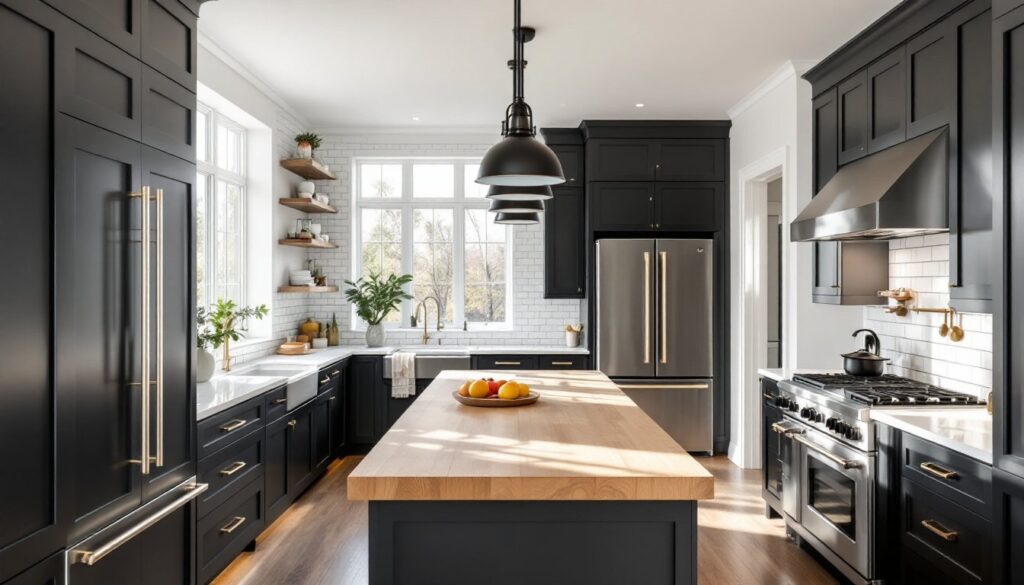
Matte black cabinets hit three design needs at once: versatility, visual weight, and timelessness. They anchor open-plan kitchens without competing with adjacent living spaces, create contrast in all-white or light wood interiors, and photograph well, a factor that matters more than ever as homeowners share projects online.
The finish works across styles. In a Scandinavian kitchen, matte black cabinets ground pale oak floors and white subway tile. In industrial lofts, they echo exposed steel beams and concrete counters. Farmhouse kitchens pair them with apron sinks and open shelving for contrast. The matte surface softens the starkness of pure black, making it approachable rather than austere.
Designers also favor matte black because it doesn’t date quickly. Unlike trendy colors that cycle every five years, black remains neutral. The matte finish, specifically, avoids the high-gloss look that dominated the early 2000s and now feels dated. It’s a safe bet for resale value, especially when paired with quality hardware and durable materials.
Another driver: the rise of mixed-finish kitchens. Homeowners increasingly combine cabinet colors, matte black lowers, white uppers, or a black island with natural wood perimeter cabinets. This layered approach adds depth without requiring bold paint throughout the entire space.
Pros and Cons of Choosing Matte Black Kitchen Cabinets
Advantages That Make Matte Black Irresistible
Matte black hides surface imperfections better than gloss or light finishes. Minor scratches, fingerprints, and water spots blend into the texture rather than reflecting light. This makes it practical for high-traffic kitchens, especially households with kids or frequent cooks.
The finish is forgiving during installation, too. Small dings or touch-ups during cabinet hanging are less visible on matte surfaces. If refinishing existing cabinets, matte black paint requires less surface prep than high-gloss, which amplifies every flaw in the underlying wood or MDF.
Matte black also maximizes contrast, making countertops, backsplashes, and hardware stand out. A white quartz counter looks crisper against matte black than against beige or gray cabinets. Brass, brushed nickel, or matte gold hardware becomes a focal point rather than blending in. Many kitchens with black cabinets use this contrast to highlight natural materials like marble or reclaimed wood.
Finally, matte black works with nearly any countertop material. Butcher block adds warmth, white marble adds luxury, concrete adds edge, and quartz offers durability. The cabinets don’t compete, they frame.
Potential Drawbacks to Consider
Matte black absorbs light, which can make small or poorly lit kitchens feel cave-like. A galley kitchen with black cabinets on both walls and limited natural light will shrink visually. This finish works best in kitchens with large windows, open layouts, or strong task lighting. Plan for under-cabinet LED strips (minimum 300 lumens per linear foot) and pendant lights over islands to counter the light loss.
Dust and grease show differently on matte black. While fingerprints are less obvious than on gloss, dust appears as a light film, and grease near the range can leave a dull haze. Regular cleaning is non-negotiable, and the wrong cleaner can damage the finish (more on that below).
Matte finishes are harder to touch up. If a cabinet door chips or scratches deeply, matching the sheen during repair is tricky. Gloss finishes can be buffed: matte cannot. Keep leftover paint or finish from the original job for touch-ups, and test on a hidden area first.
Finally, matte black doesn’t reflect light to make spaces feel larger. White or light gray cabinets bounce light around, making kitchens feel airier. Black does the opposite. If the goal is to open up a tight space, matte black might work against that objective unless balanced with ample white or light-toned surfaces.
Best Design Styles and Color Pairings for Matte Black Cabinets
Matte black cabinets anchor several design styles, but pairings matter. In modern minimalist kitchens, pair them with white quartz counters, stainless steel appliances, and handleless cabinet doors (push-to-open mechanisms). Keep hardware minimal or invisible. The result is clean, monochromatic, and uncluttered.
Industrial kitchens pair matte black cabinets with concrete countertops, open metal shelving, and Edison bulb pendants. Exposed brick or subway tile backsplashes add texture. Use black metal bar stools and matte black faucets to tie the theme together.
For modern farmhouse, combine matte black lowers with white shaker-style uppers. Add a farmhouse sink, butcher block counters, and brass or bronze hardware. Open shelving with white dishware balances the dark base. This two-tone approach is popular because it delivers contrast without overwhelming the space.
Scandinavian kitchens use matte black sparingly, often just the island or a single wall, against pale wood floors, white walls, and light oak or birch accents. The black grounds the airiness without darkening the room. Pair with simple, functional hardware in brushed steel.
Color pairings beyond white include warm woods (walnut, oak, or teak), soft grays (for backsplash or walls), brass or gold accents (cabinet pulls, faucets, light fixtures), and natural stone (marble, soapstone, or honed granite). Avoid pairing matte black with dark granite or dark walls unless the kitchen has exceptional natural light: the cumulative effect can feel oppressive.
Many designers showcased in photo galleries of real homes use matte black as an accent rather than the dominant color, reserving it for islands, pantry doors, or lower cabinets to maintain balance.
How to Maintain and Clean Matte Black Kitchen Cabinets
Matte finishes require different care than gloss. The porous texture can trap oils and residue, so cleaning frequency matters more than product strength. Weekly maintenance involves wiping down doors and drawer fronts with a microfiber cloth dampened with warm water and a few drops of dish soap. Wring the cloth nearly dry, excess water can seep into seams and cause MDF core swelling if cabinets aren’t solid wood.
Avoid ammonia-based cleaners, abrasive sponges, and anything labeled “all-purpose degreaser” unless it’s specifically matte-safe. These products can strip the finish or leave a shiny residue that mars the uniform matte appearance. For grease buildup near the range, use a dedicated matte-finish cleaner or a paste of baking soda and water applied gently with a soft cloth. Rinse with a damp cloth and dry immediately.
Dust control is simpler than with gloss, but it’s still visible. A dry microfiber cloth or a duster with electrostatic properties picks up dust without water. Do this every few days in high-traffic kitchens.
For stubborn spots, test any cleaner on a hidden area first, inside a cabinet door or the back of a toe kick. Some matte paints and laminates react unpredictably to citrus-based or vinegar-based solutions.
Don’t wax or polish matte cabinets. Products designed to add shine will create uneven patches. If the finish dulls over time, the issue is usually buildup, not wear. A thorough cleaning often restores the original look. If not, the cabinets may need a fresh topcoat, which is a refinishing job, not a maintenance task.
Finally, control moisture. Run the range hood during cooking (minimum 300 CFM for a standard range) to reduce grease and steam settling on cabinet surfaces. This simple habit extends the life of any finish, matte or otherwise.
DIY vs. Professional Installation: What Homeowners Need to Know
Installing matte black cabinets, or refinishing existing ones, is a decision point between DIY and hiring pros. The complexity depends on whether it’s new construction, a remodel, or a cosmetic update.
Painting existing cabinets matte black is a realistic DIY project for experienced home improvers. The steps include removing doors and hardware, cleaning all surfaces with a deglosser (TSP substitute works well), lightly sanding with 220-grit sandpaper to scuff the surface, applying a bonding primer (like Zinsser B-I-N or KILZ Adhesion), and finishing with two coats of matte black cabinet paint. Brands like Benjamin Moore Advance or Sherwin-Williams Emerald Urethane offer durable matte finishes formulated for cabinets. Drying time matters, allow 16 hours between coats and at least 7 days of cure time before reinstalling hardware and closing doors fully. Rushing this causes finish damage.
Use a high-density foam roller for doors and a 2-inch angled brush for frames. A paint sprayer (HVLP or airless) delivers the smoothest finish but requires more skill and a well-ventilated or outdoor workspace. Expect the project to take a long weekend for an average-sized kitchen, plus cure time.
Installing new cabinets is more complex. Hanging wall cabinets requires locating studs (typically 16 inches on center), ensuring level installation (a laser level helps), and securing with 3-inch cabinet screws into studs, not just drywall. Base cabinets must be shimmed level before securing, and all face frames need alignment before final fastening. This is a two-person job minimum. If the kitchen isn’t square or the floor isn’t level, expect troubleshooting.
DIYers comfortable with a drill, level, stud finder, and basic carpentry can handle installation, but mistakes are costly. An out-of-level upper cabinet tilts dishes and looks sloppy. Improperly secured cabinets can pull away from walls over time.
When to hire a pro: if the job involves removing old cabinets and disposing of them, dealing with plumbing or electrical relocations, installing heavy or custom cabinets, or working in a kitchen with non-standard dimensions. Professional installers work faster, carry insurance, and know how to handle surprises like uneven walls or missing studs. Expect to pay $50–$150 per linear foot for installation labor, varying by region and cabinet complexity.
Refinishing is a middle ground. Some homeowners hire pros to spray-paint cabinets in place (using temporary plastic containment) while DIYing the prep work. This cuts costs while ensuring a smooth, professional finish.
Regardless of who does the work, check with your local building authority. Most cabinet installations don’t require permits, but if the project involves moving gas lines, electrical outlets, or structural changes, permits and inspections may be required. Skipping this step can complicate future home sales or insurance claims.