
Commercial shower cleaners work, but they come with a trade-off: harsh fumes, skin irritants, and ingredient lists that read like a chemistry exam. For homeowners looking to cut down on chemical exposure without sacrificing a spotless shower, natural cleaners offer a practical middle ground. The good news? Effective shower cleaners can be mixed up with pantry staples in under five minutes, and they tackle soap scum, hard water stains, and mildew without requiring a respirator. This guide walks through why natural cleaners make sense, what ingredients actually work, and how to mix and apply them for real results.
Table of Contents
ToggleKey Takeaways
- Natural shower cleaner recipes using white vinegar, baking soda, and dish soap eliminate harsh fumes and chemical exposure while costing 75% less than commercial products.
- A natural shower cleaner spray of 1 cup vinegar, 1 cup water, and 1 tablespoon dish soap tackles soap scum, hard water stains, and daily grime in 5 minutes with proper dwell time of 5–10 minutes.
- Squeegee after every shower and run the exhaust fan for 20–30 minutes to prevent mold and mineral buildup, making natural cleaning faster and less frequent.
- Baking soda paste works best on stubborn soap scum and grout lines when given 5–10 minutes of contact time, paired with non-scratch scrub tools to avoid surface damage.
- Sealed grout lines and quality silicone caulk prevent water seepage and mold growth, reducing the need for deep cleaning and protecting your shower investment.
Why Choose Natural Shower Cleaners Over Chemical Products
The shift toward natural cleaning products isn’t just a lifestyle trend, it’s rooted in practical concerns. Many conventional shower cleaners contain ingredients like bleach, ammonia, and volatile organic compounds (VOCs) that can irritate respiratory systems, especially in poorly ventilated bathrooms. For households with kids, pets, or anyone with asthma or allergies, reducing chemical exposure is a legitimate safety consideration.
Natural cleaners also reduce environmental impact. Phosphates and synthetic surfactants in commercial products can disrupt aquatic ecosystems when they go down the drain. By contrast, ingredients like white vinegar, baking soda, and castile soap break down quickly and pose minimal environmental risk.
Cost is another factor. A gallon of white vinegar runs about $3 to $5, and it’ll handle dozens of cleaning sessions. Compare that to brand-name shower sprays that can cost $5 to $8 per bottle. The trade-off? Natural cleaners often require a bit more elbow grease on heavy buildup, and they won’t smell like artificial lavender. But for routine maintenance, they’re more than capable.
Essential Ingredients for Homemade Shower Cleaners
Building an effective natural cleaner starts with understanding what each ingredient does. Here’s what belongs in a DIYer’s cleaning arsenal:
White Vinegar (5% acidity)
The workhorse of natural cleaning. Acetic acid cuts through hard water deposits, dissolves soap scum, and kills some mold and mildew. Distilled white vinegar is the standard, avoid apple cider or other flavored varieties, which can leave residue or stains.
Baking Soda (Sodium Bicarbonate)
A mild abrasive that scrubs without scratching most surfaces (test on natural stone first). It also neutralizes odors and boosts cleaning power when combined with acidic ingredients.
Dish Soap (Unscented, Dye-Free Preferred)
Provides surfactant action to break down oils and soap residue. A few drops go a long way. Stick with plant-based formulas if possible, they’re gentler on septic systems.
Castile Soap
A vegetable-based soap that works well in general-purpose cleaners. It’s more concentrated than dish soap, so use sparingly. Dr. Bronner’s is a common brand, but any pure castile soap works.
Essential Oils (Optional)
Tea tree oil has antifungal properties: lemon or eucalyptus oils add a fresh scent. Use 10 to 15 drops per 16-ounce spray bottle. Not strictly necessary for cleaning power, but they help mask vinegar’s sharpness.
Hydrogen Peroxide (3% Solution)
Useful for mold and mildew. It’s a mild bleaching agent, so test on colored grout before widespread use. Don’t mix with vinegar in the same bottle, it creates peracetic acid, which is irritating.
Avoid mixing vinegar and baking soda in a sealed container. The fizzy reaction looks impressive but quickly neutralizes both ingredients, leaving you with slightly salty water.
Simple DIY Natural Shower Cleaner Recipes
These recipes cover daily maintenance and heavier scrubbing. Measurements don’t need to be lab-precise, but consistency matters for repeatable results.
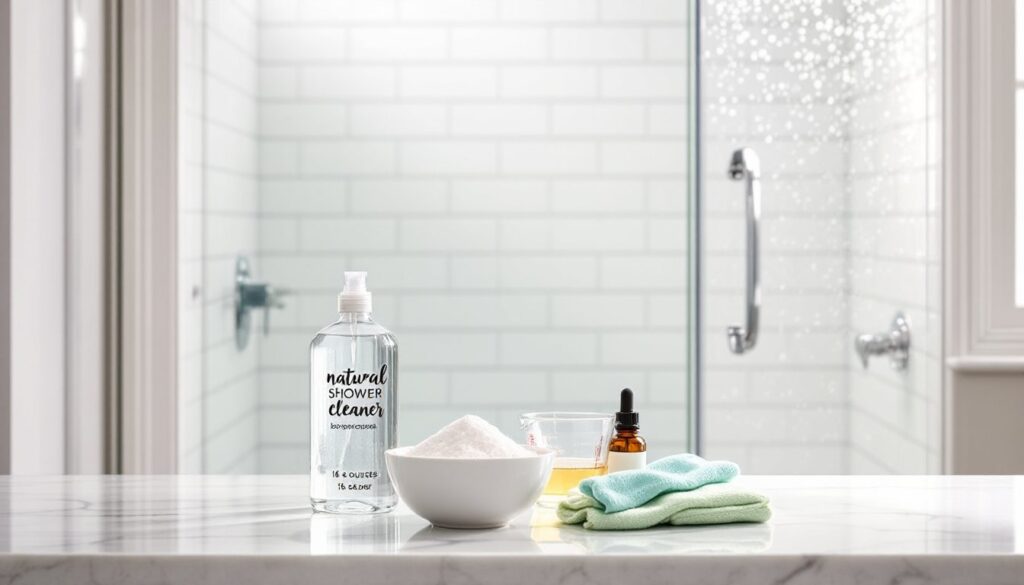
Daily Vinegar and Dish Soap Spray
This is the go-to for regular upkeep. It handles light soap scum, water spots, and surface grime without much effort. Homeowners who prefer cleaning techniques that emphasize simplicity often rely on this ratio.
Materials:
- 1 cup white vinegar (5% acidity)
- 1 cup water (distilled if you have hard water)
- 1 tablespoon dish soap (unscented preferred)
- 10 drops essential oil (optional)
- 16-ounce spray bottle (glass or HDPE plastic)
Mixing Instructions:
- Pour vinegar and water into the spray bottle using a funnel if needed.
- Add dish soap. Pour slowly to minimize foaming.
- Add essential oil if using.
- Cap the bottle and swirl gently to combine. Don’t shake hard, you’ll create a foam mess.
- Label the bottle with contents and date mixed.
Application:
Spray tile, glass doors, and fixtures after each shower while surfaces are still warm and damp. Let it sit for 2 to 3 minutes, then wipe with a microfiber cloth or squeegee. For tougher spots, let it sit up to 10 minutes before scrubbing lightly with a non-abrasive sponge.
Shelf Life:
Mixed cleaner stays effective for about 2 to 3 weeks. Vinegar’s acidity keeps bacteria at bay, but separation can occur. Swirl before each use.
Baking Soda Scrub for Stubborn Soap Scum
When spray-and-wipe isn’t cutting it, a paste-based scrub provides the abrasive action needed. This works especially well on textured tile and grout lines.
Materials:
- 1/2 cup baking soda
- 2 to 3 tablespoons water or white vinegar (for a fizzy paste)
- Small mixing bowl
- Non-scratch scrub sponge or stiff-bristle brush
Mixing Instructions:
- Pour baking soda into the bowl.
- Add water or vinegar one tablespoon at a time, stirring until you get a thick, spreadable paste. If using vinegar, expect fizzing, it’s harmless.
- Use immediately: the paste doesn’t store well.
Application:
- Wet the shower surface lightly.
- Apply paste with a sponge or gloved fingers, focusing on soap scum lines and grout.
- Let sit for 5 to 10 minutes. Don’t let it dry completely, re-dampen if needed.
- Scrub in circular motions. For grout, a stiff-bristle grout brush (not a wire brush) works better than a sponge.
- Rinse thoroughly with warm water. Residual baking soda can leave a white haze if not fully rinsed.
Safety Note:
Wear rubber gloves. Baking soda paste is safe, but prolonged contact can dry out skin. If scrubbing overhead, wear safety goggles to keep paste out of your eyes.
How to Use Natural Cleaners for Best Results
Natural cleaners work, but they’re not magic. Results depend on technique and realistic expectations.
Pre-Wet Surfaces
Spraying cleaner onto dry soap scum is like trying to sand wood with a dull blade. Lightly dampen tile and glass first, it helps the cleaner spread evenly and prevents rapid evaporation.
Give It Time
Acetic acid and baking soda need contact time to break down deposits. Most natural cleaners benefit from a 5 to 10-minute dwell. For heavy buildup, some homemade cleaning sprays recommend up to 15 minutes.
Use the Right Tool
- Microfiber cloths for glass and smooth tile (they won’t scratch and they trap grime better than cotton rags)
- Non-scratch scrub sponges (look for the blue or green Scotch-Brite pads) for general scrubbing
- Grout brushes with stiff nylon bristles for grout lines
- Squeegees for glass doors, faster than cloth and prevents streaks
Avoid steel wool or abrasive powders on fiberglass, acrylic, or chrome. They’ll scratch. On natural stone (marble, travertine), even baking soda can be too abrasive, test in an inconspicuous spot first.
Ventilate
Even natural cleaners benefit from airflow. Vinegar fumes are mild compared to bleach, but they’re still unpleasant in a closed space. Crack a window or run the exhaust fan.
Rinse Thoroughly
Vinegar residue can dull chrome fixtures over time. Baking soda left on grout can attract dust. A final rinse with clean water and a wipe-down prevents these issues.
Know When to Call It
If mold has penetrated grout or caulk, surface cleaning won’t fix it. You’ll need to remove and replace the caulk or regrout. Black stains that don’t respond to hydrogen peroxide or vinegar after multiple treatments are often deep mold, which may require a mold remediation professional, especially if covering more than 10 square feet (EPA threshold).
Preventing Buildup and Maintaining a Clean Shower Naturally
The easiest shower to clean is the one that never gets dirty. Prevention beats scrubbing every time.
Squeegee After Every Shower
Takes 30 seconds. Removing standing water dramatically reduces soap scum and hard water deposits. For glass doors, this alone can cut deep-cleaning frequency in half.
Run the Exhaust Fan
Moisture is mold’s best friend. Run the fan during showers and for 20 to 30 minutes afterward. If your bathroom doesn’t have a fan, crack a window. Consistent ventilation is more effective than any cleaner at preventing mildew.
Weekly Maintenance Spray
A quick spray-down with the vinegar-dish soap mix once a week keeps buildup from gaining a foothold. No scrubbing needed, just spray, let sit briefly, and rinse.
Address Hard Water at the Source
If you’re fighting mineral deposits constantly, the problem isn’t your cleaner, it’s your water. A whole-house water softener or a showerhead filter can reduce calcium and magnesium that cause scale. Filters run $20 to $50 and thread onto standard shower arms: whole-house systems start around $500 installed but pay off in reduced cleaning time and longer fixture life.
Seal Grout Lines
Unsealed grout is porous and absorbs water, soap, and mold. After cleaning, apply a penetrating grout sealer (not a topical coating). Products like Aqua Mix Sealer’s Choice Gold are common in tile supply stores. Reapply every 1 to 2 years depending on shower use. This isn’t a cleaning step per se, but it makes future cleaning far easier.
Replace Worn Caulk
Caulk around tub edges and in corners eventually cracks or pulls away. When it does, water seeps behind tile, creating mold you can’t reach with any cleaner. Inspect caulk lines every six months. If you see gaps, mildew, or cracking, scrape out the old bead with a utility knife or caulk removal tool, clean thoroughly, and reapply 100% silicone caulk (not acrylic latex, silicone resists mold better). Homeowners who stay on top of home organization and maintenance routines report fewer emergency repairs.
Safety Gear for Maintenance:
Even routine cleaning benefits from basic PPE. Rubber gloves protect hands from prolonged vinegar contact. If scrubbing overhead or using any spray, safety goggles prevent splashes. For heavy mold scrubbing with hydrogen peroxide, an N95 mask reduces spore inhalation.